https://github.com/afollestad/material-dialogs
GitHub - afollestad/material-dialogs: 😍 A beautiful, fluid, and extensible dialogs API for Kotlin & Android.
😍 A beautiful, fluid, and extensible dialogs API for Kotlin & Android. - GitHub - afollestad/material-dialogs: 😍 A beautiful, fluid, and extensible dialogs API for Kotlin & Android.
github.com
오늘은 미디움 에서 받은 메일의 내용중에서 기억해 두면 좋을 것 같은 정보 하나를 읽어 보도록 하겠습니다.
앱을 만들다 보면 알림 다이얼로그를 구현해야 하는 경우가 종종 발생합니다. 이런 경우 일반적이라면 AlertDiaglog 을 활용하게 됩니다. 통상적인 다이얼로그는 theme 을 기준으로 해서 화면에 구현이 되고, 사각형 박스 형태로만 운영이 됩니다. 또한 컴스터하게 다이얼로그를 만들려고 할려면 layout 파일을 구성하거나 하는 방법으로 구현을 하기도 했습니다.
jetpack compose 으로 넘어가면서 그 마저도 화면을 일일이 구현하는 방식으로 전환 되어야 했습니다. 이제는 조금은 수월하게 알림을 구현해 볼 수 있을까 ? 도전해 보도록 하겠습니다.
먼저 일반적으로 작성한 코드를 살펴 볼께요. 다음과 같이 builder 을 만들고, 설정을 하고, 선언을 한 다음,
버튼의 색도 필요에 따라서 색을 입혀볼 수 있었습니다.
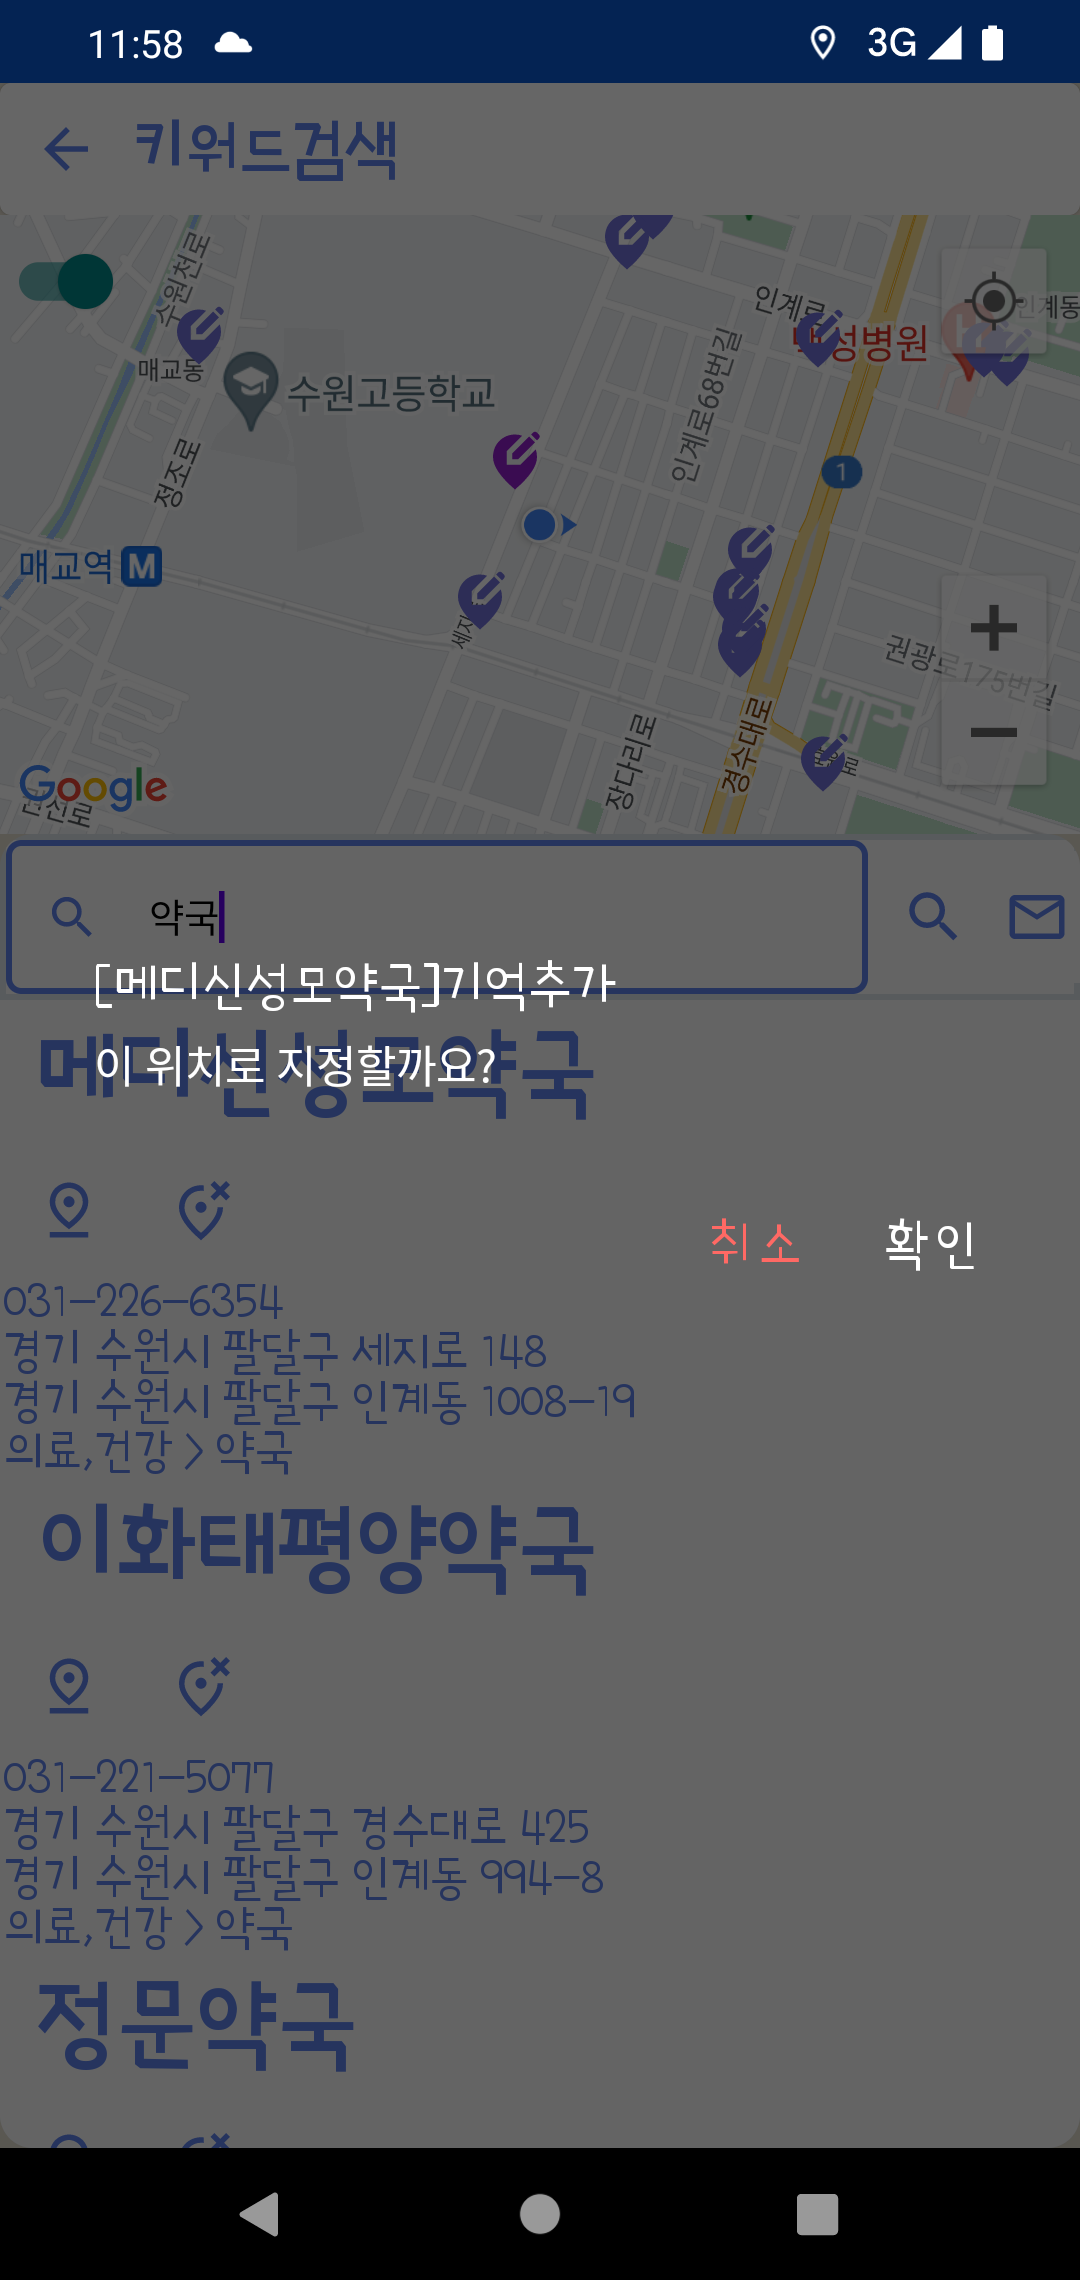
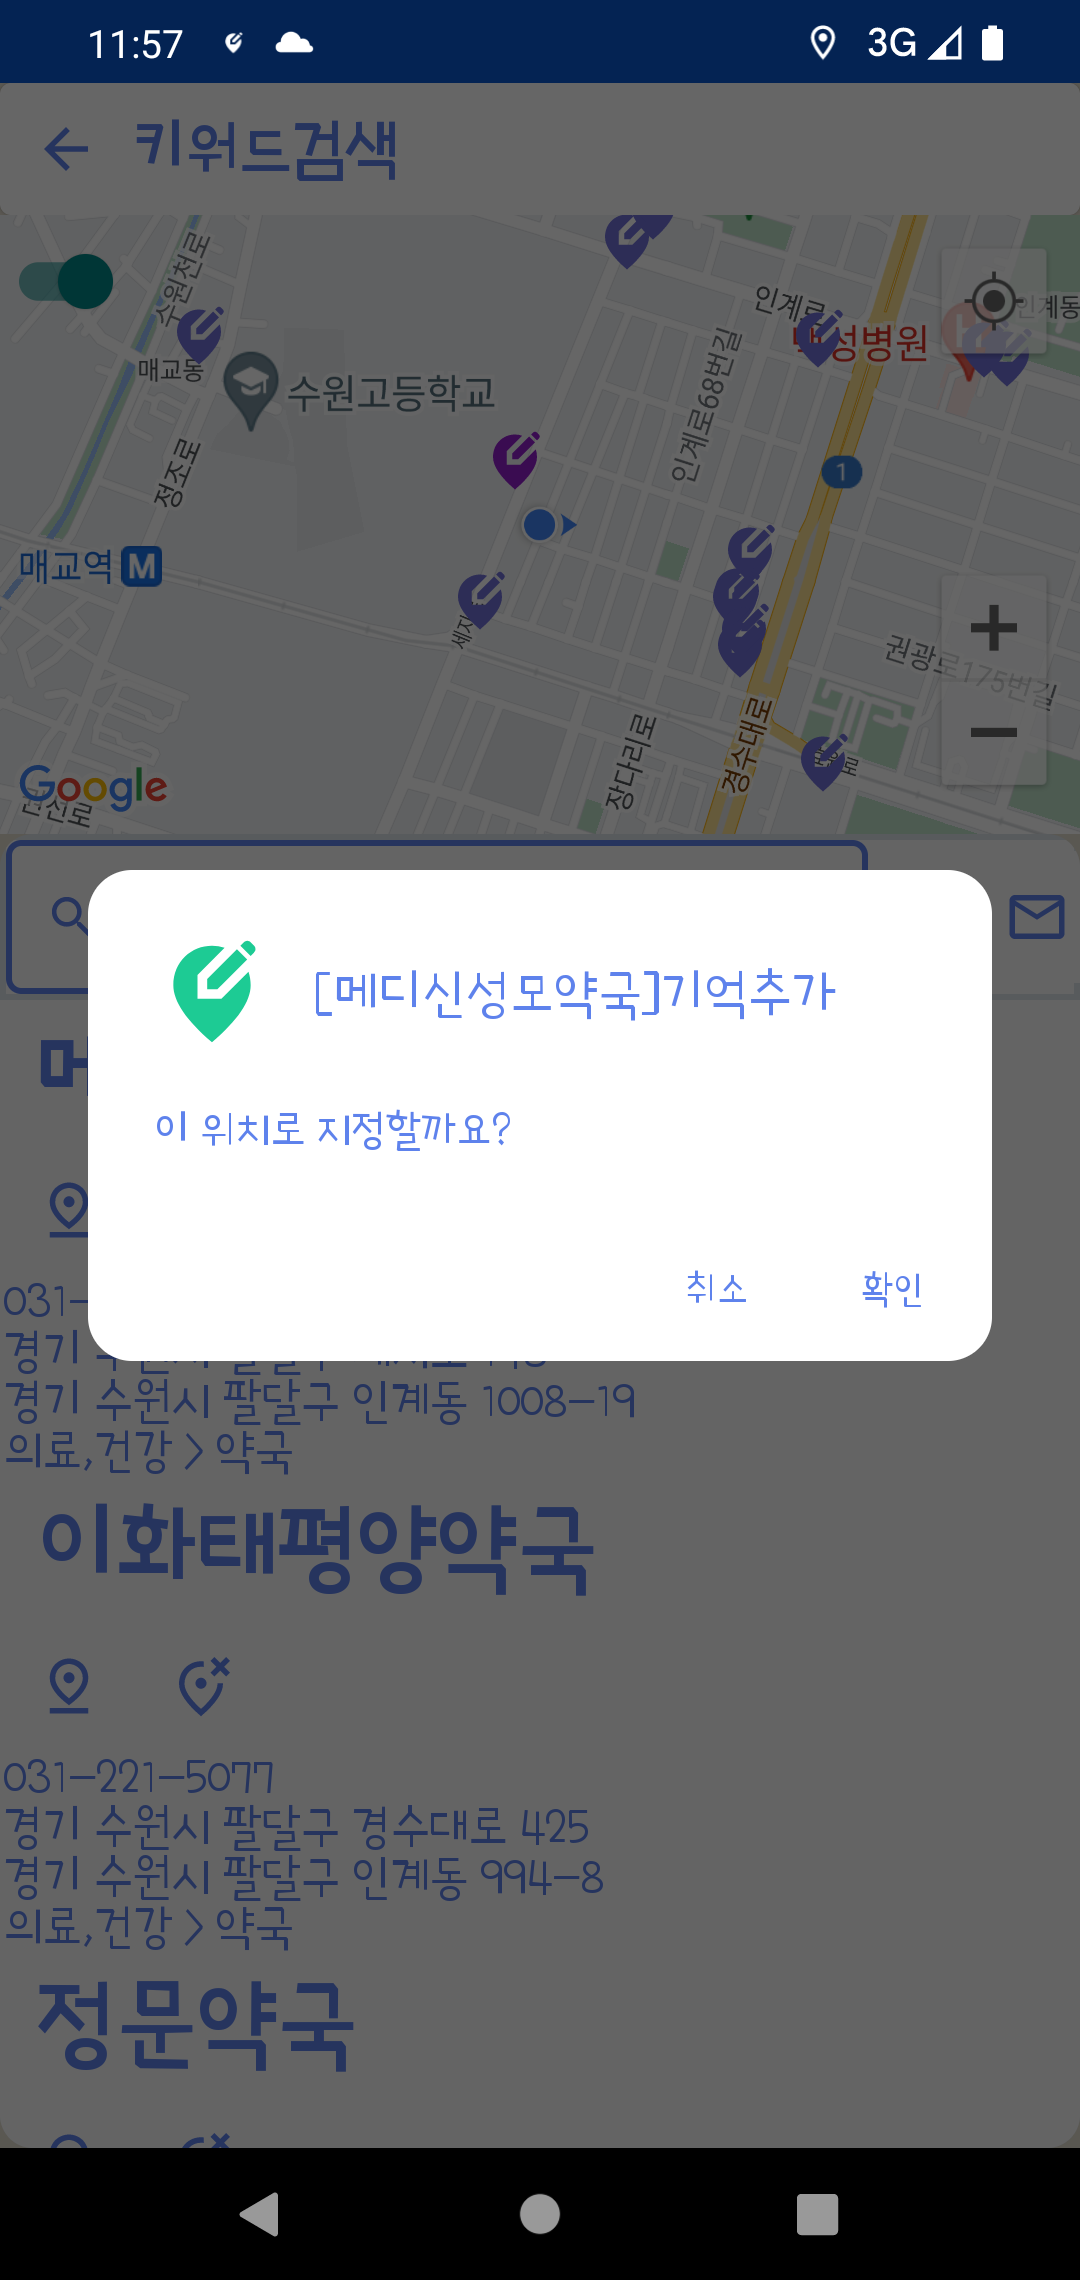
val builder = AlertDialog.Builder(this@MainComposeActivity, R.style.Theme_MaterialComponents_Dialog_Alert)
    .setTitle("[" + documents.placeName + "]" + getString(R.string.add_geofences))
    .setMessage(getString(R.string.msgAddGeoFences))
    .setPositiveButton(getString(R.string.OK), DialogInterface.OnClickListener{ dialogInterface, i ->
        doAddGeoFence(documents)
    })
    .setNegativeButton(getString(R.string.CANCEL), DialogInterface.OnClickListener { dialogInterface, i ->

    })
var alertDialog = builder.create()
alertDialog.show()
alertDialog.window?.setBackgroundDrawable(ColorDrawable(android.graphics.Color.TRANSPARENT))
alertDialog.getButton(DialogInterface.BUTTON_POSITIVE).setTextColor(getColor(R.color.white))
alertDialog.getButton(DialogInterface.BUTTON_NEGATIVE).setTextColor(getColor(R.color.softRed))
변경후에는 위에서 소개된 라이브러리를 이용해서 이겠지만, 코드가 무척 단순해 졌음을 알 수 있습니다.
MaterialDialog(this).show {
    icon (R.drawable.ic_location_softgreen)
    title(text = "[" + documents.placeName + "]" + getString(R.string.add_geofences))
    message(R.string.msgAddGeoFences)
    positiveButton (R.string.OK) {
        doAddGeoFence(documents)
    }
    negativeButton (R.string.CANCEL){

    }
}
다만 font 나 버튼색을 입히기 위헤서 style 파일에 다이얼로그을 위한 style 을 지정했습니다.
<style name="AppTheme.Custom" parent="Theme.Ontheway801">

    <item name="md_corner_radius">16dp</item>
    <item name="md_color_title">@color/softBlue</item>
    <item name="md_color_content">@color/softBlue</item>
    <item name="md_color_button_text">@color/softBlue</item>
    <item name="md_background_color">@color/transParent</item>
    <item name="md_font_title">@font/poorstory_regular</item>
    <item name="md_font_body">@font/poorstory_regular</item>
    <item name="md_font_button">@font/poorstory_regular</item>

</style>
또한 onCreate 에서 setTheme 을 이용해서 설정을 해 주었습니다.
setTheme( R.style.AppTheme_Custom )
위애서 소개했던 material-dialogs 중에서 이제 겨우 1개에 대한 내용을 읽어보고 따라하기를 해 보았습니다. ㅋ~
언제 다 경험을 해 볼 수 있을까요?
'모바일 앱(안드로이드)' 카테고리의 다른 글
| 안드로이드 앱 만들기 : 광고 ID 구현은 어떻게 ? (0) | 2022.09.15 |
|---|---|
| 안드로이드 앱 만들기 : 오피넷 API 활용해 보기... 요소수 주유소 검색 기능 (2) | 2022.08.29 |
| 안드로이드 앱 만들기 : Android Studio Update Dolphin Beta 5 (7) | 2022.08.14 |
| 안드로이드 앱 만들기 : GoogleMap(구글맵) (feat Jetpack Compose) (2) | 2022.08.10 |
| 안드로이드 앱 만들기 : kotlin 배우기를 위한 공유 (0) | 2022.08.03 |